


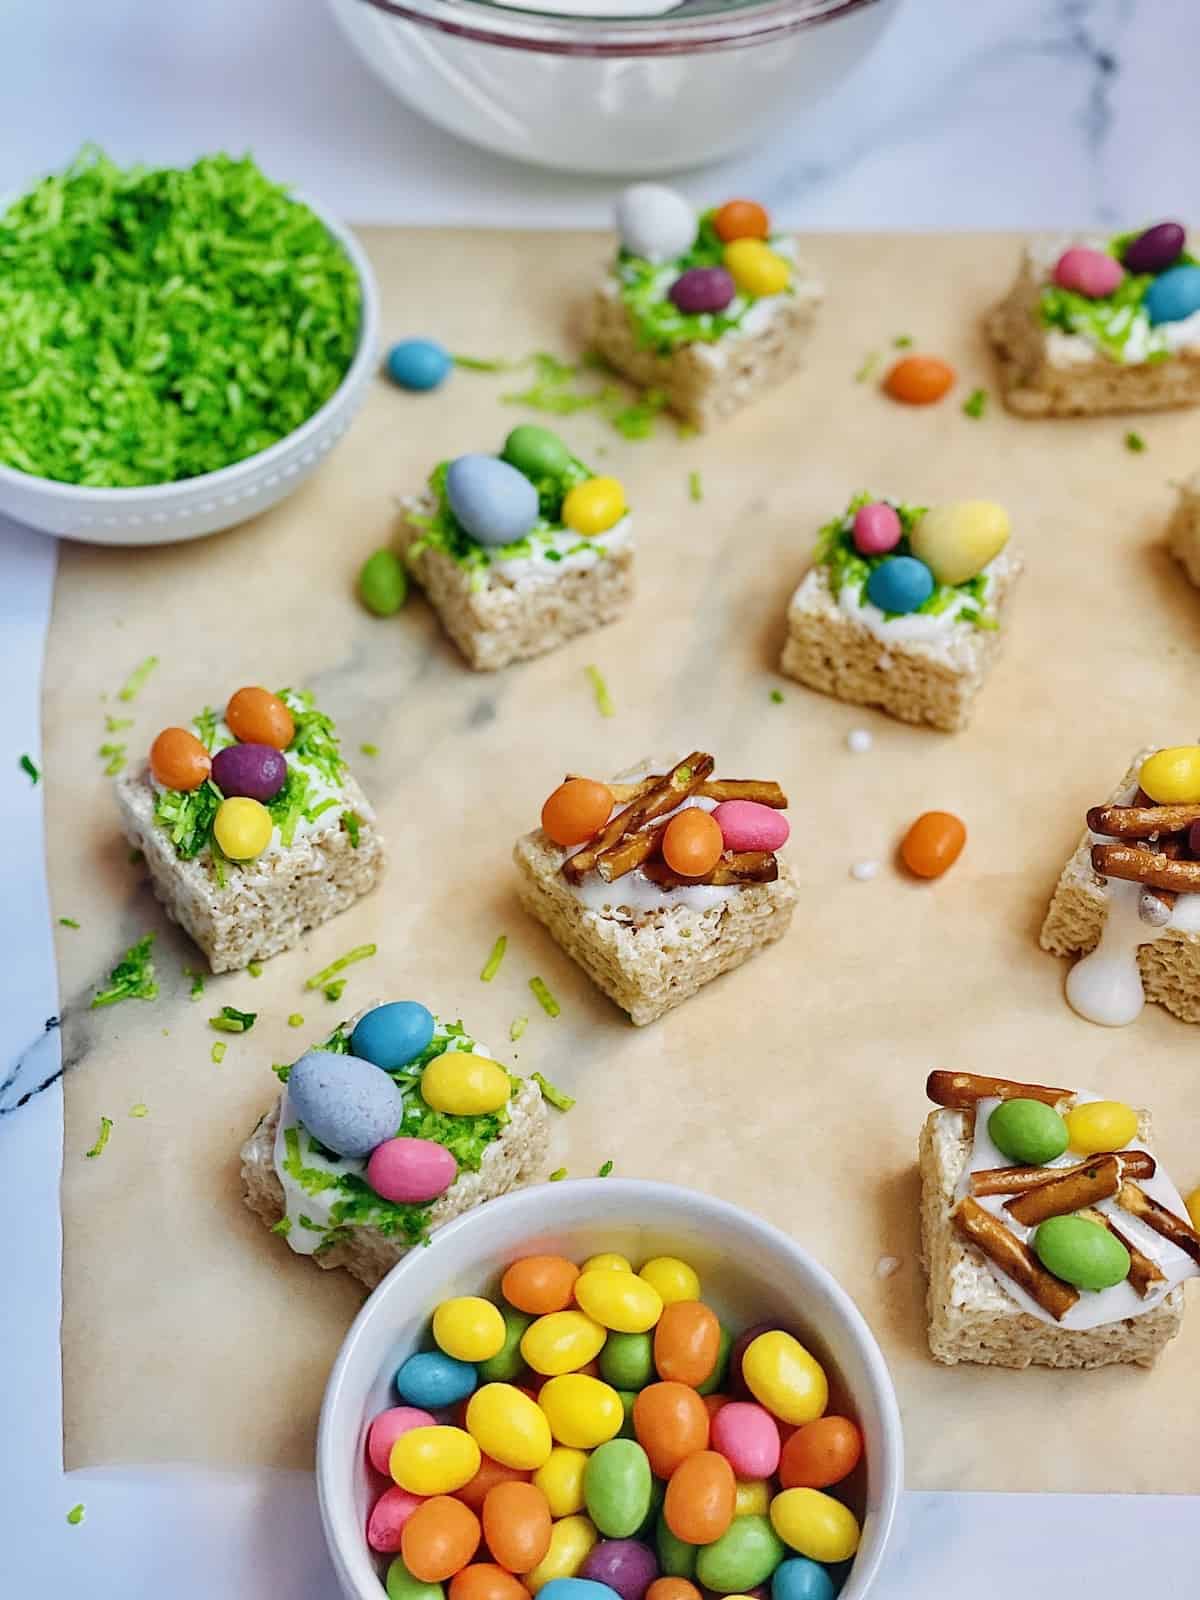
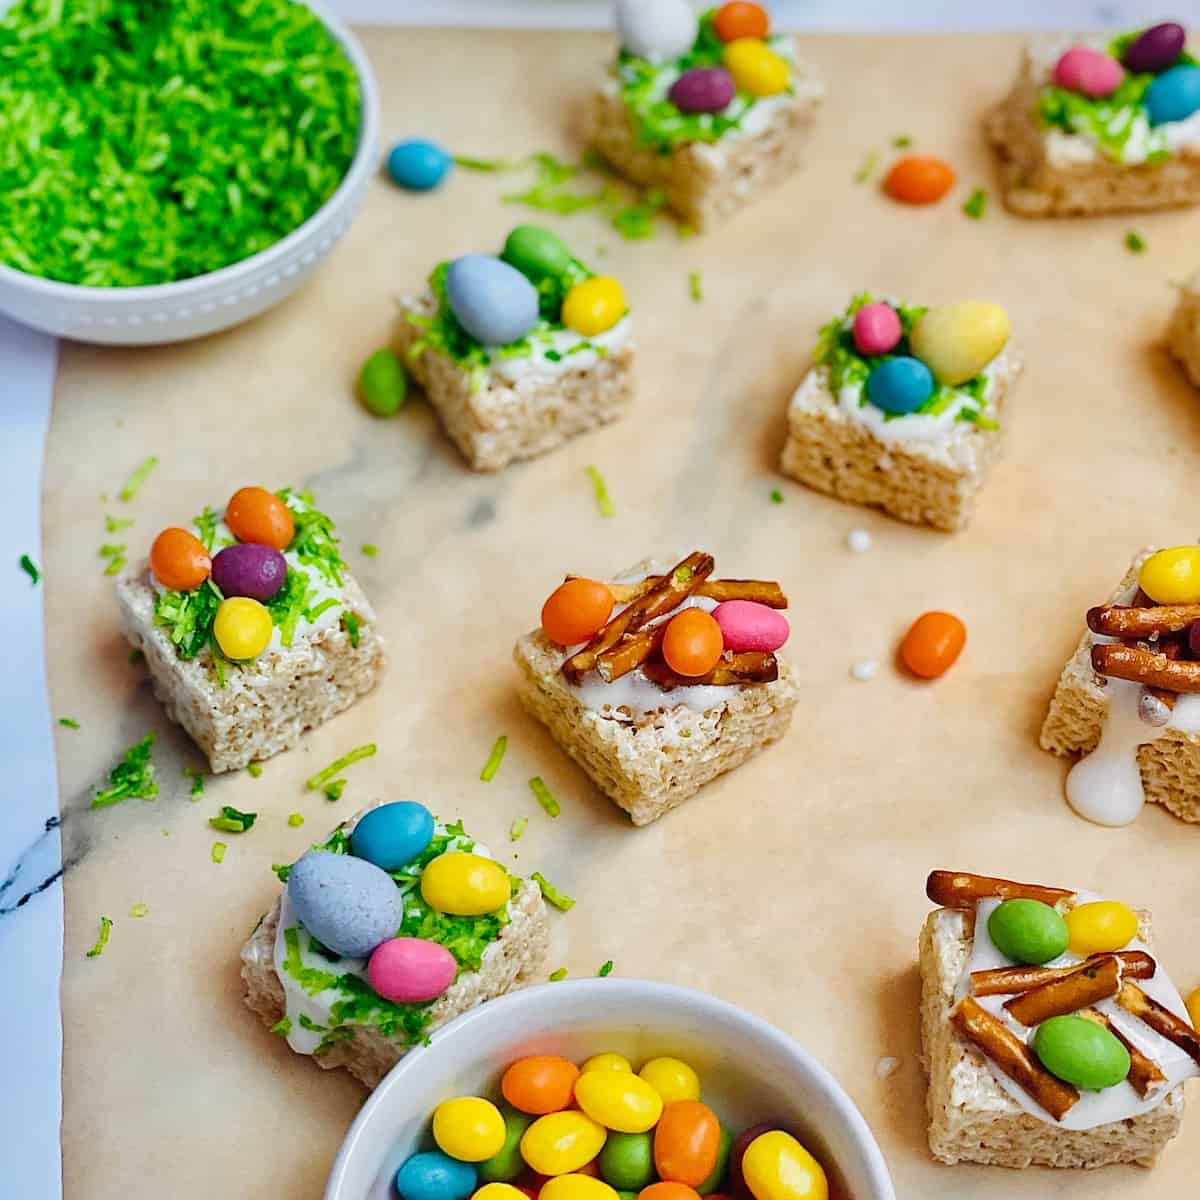
Make fun Mini Egg Rice Krispie Squares for Easter! These easy Easter dessert is made in less than 10 minutes using premade rice krispie squares topped with melted marshmallow, coconut grass, mini eggs and pretzel sticks.
My kids love creating sweet Easter recipes, and these Mini Egg Rice Krispie Squares are something they came up with after helping to put together this Easter candy charcuterie board. Easter is their favorite holiday, I'm sure it's because of all the bunny-themed desserts and treats they know they get to enjoy! Chocolate Easter dirt cups and chocolate egg brownies are more of their favorites.
These treats take less than 10 minutes to put together. There is no baking or cooking necessary (just a simple melting of marshmallows). All ingredients are store bought and each krispie square can be made a little differently. So give the kids a few to decorate themselves and see what creation they come up with!
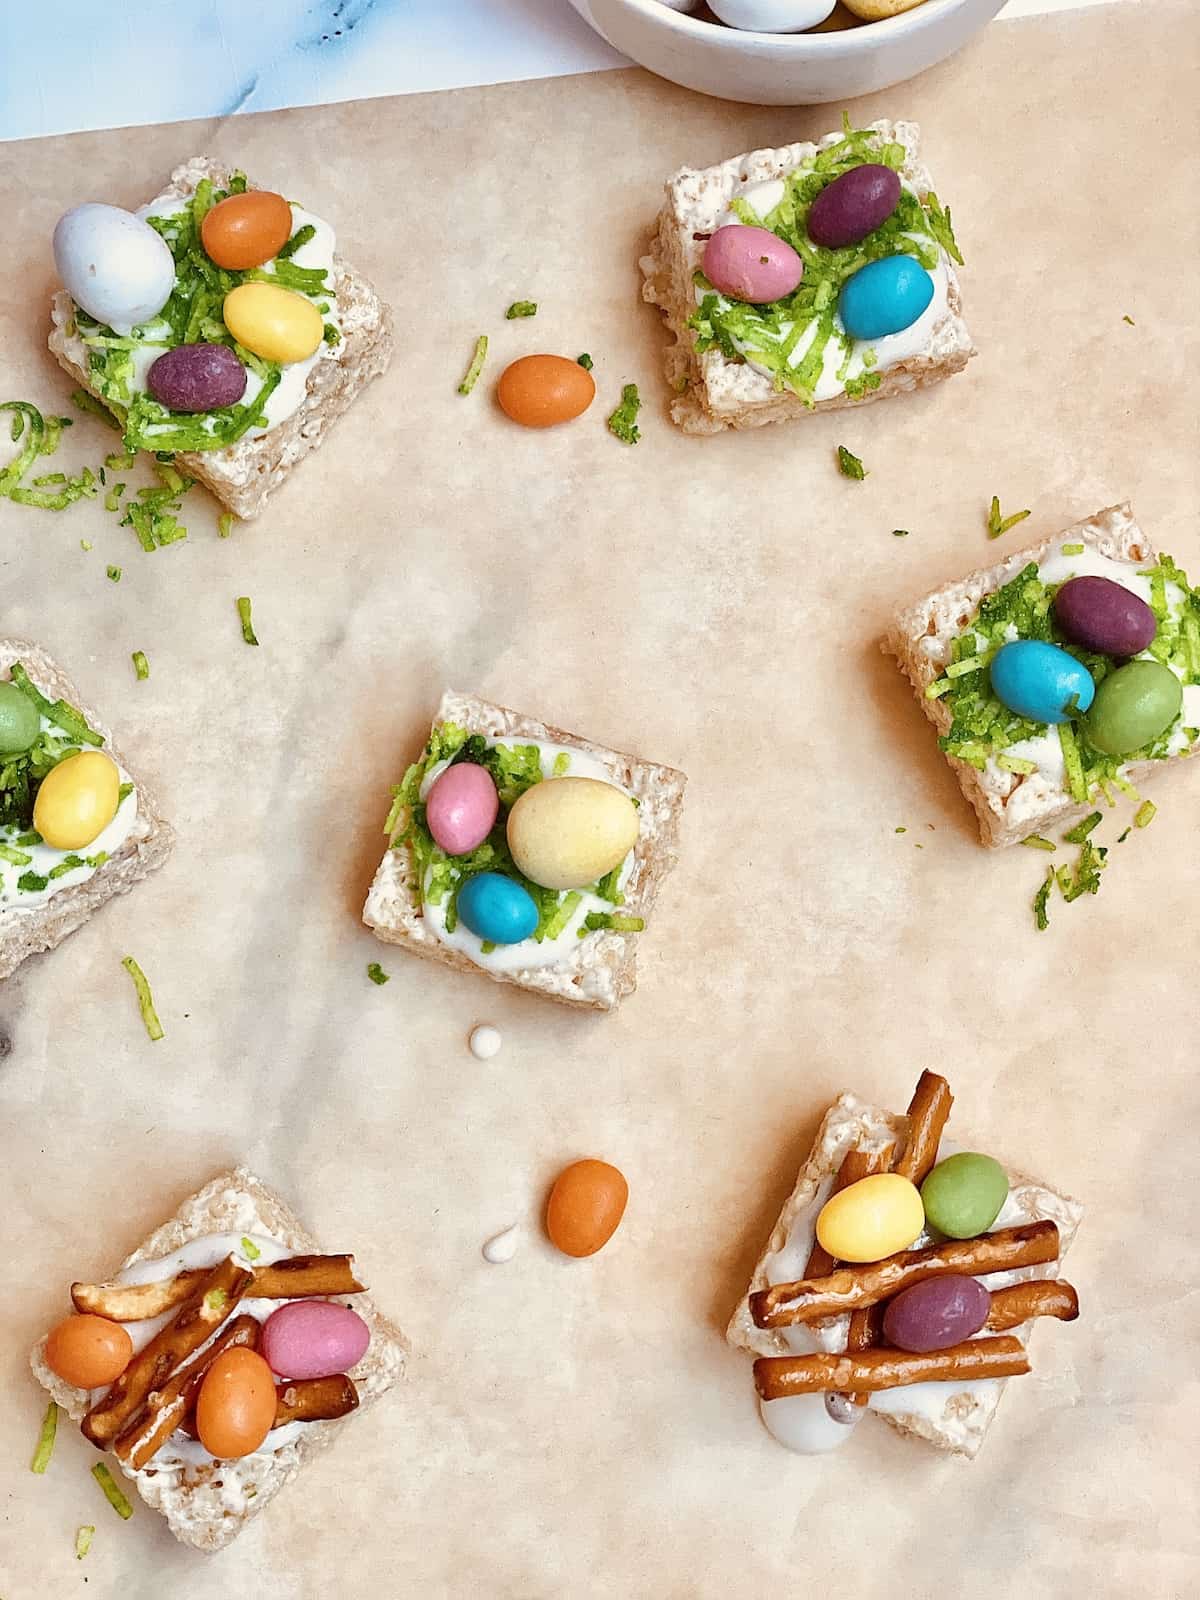
Mini egg rice krispie squares can be made into birds nests or a grassy egg field-or anything else you can think of!
What You'll Need
You need:
- Mini Rice Krispie Squares: or if you want to make larger ones, the standard size Rice Krispies are good.
- Shredded coconut: use sweetened for the best flavor.
- Green food coloring: to dye the shredded coconut and make "grass".
- Marshmallows: either mini or jumbo.
- Pretzel sticks: these are optional and can be used to make bird nests instead of a grassy egg field.
- Cadbury Mini Eggs: or use jelly beans or a combination of both.
Instructions
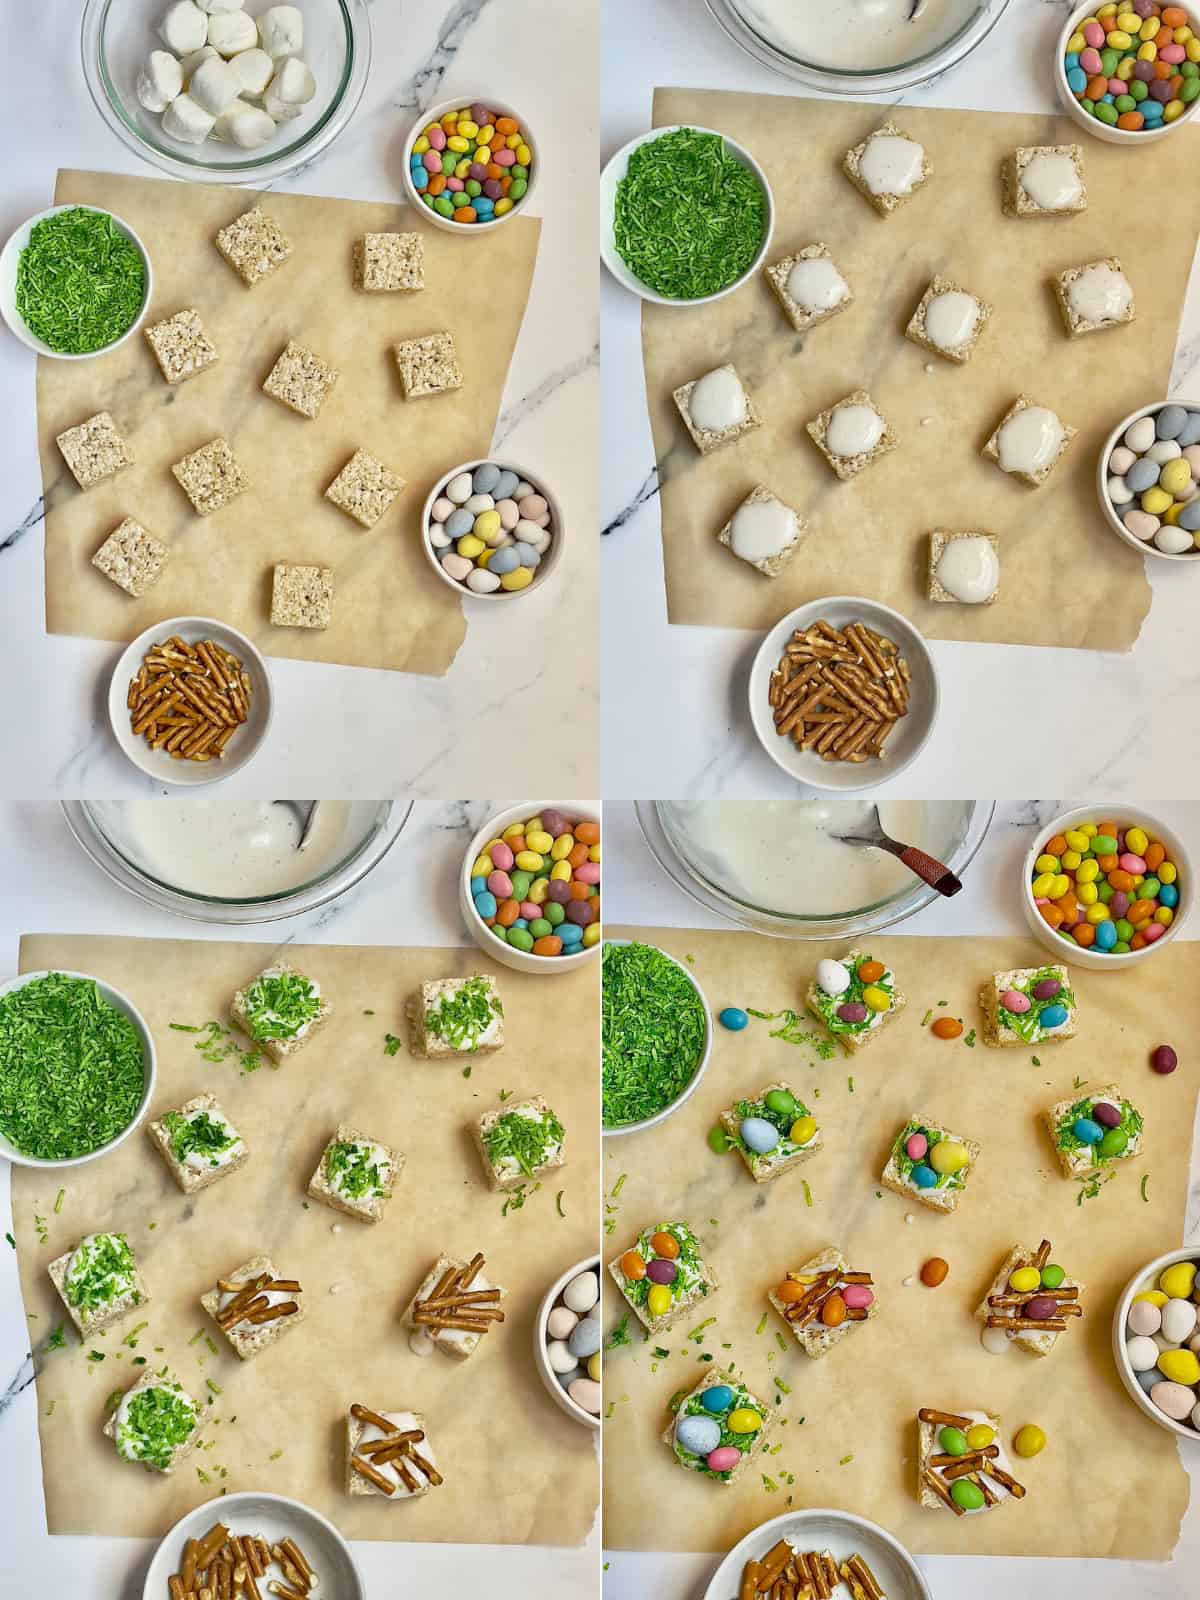
- Prepare your workspace first, since once the marshmallow is melted you'll need to work fairly quick. Arrange the mini Rice Krispie squares on a serving dish, parchment paper or wax paper (anywhere that is okay to get a little messy). Get the jelly beans or mini egg bags open and ready to use. Break the pretzel sticks into 2 or 3 pieces.
- Next dye the shredded coconut green to make grass. Put the coconut into a mixing bowl and mix it with a few drops of green food coloring. Continue adding food coloring as needed to reach your desired shade of green.
- The last step of preparation is to melt the marshmallows. Put the marshmallows into a microwave-safe bowl and add 2 teaspoons of water. Heat in the microwave in 15 second increments until melted, mixing well between increments. This should take about 60 seconds total for jumbo marshmallows and a less time for mini marshmallows.
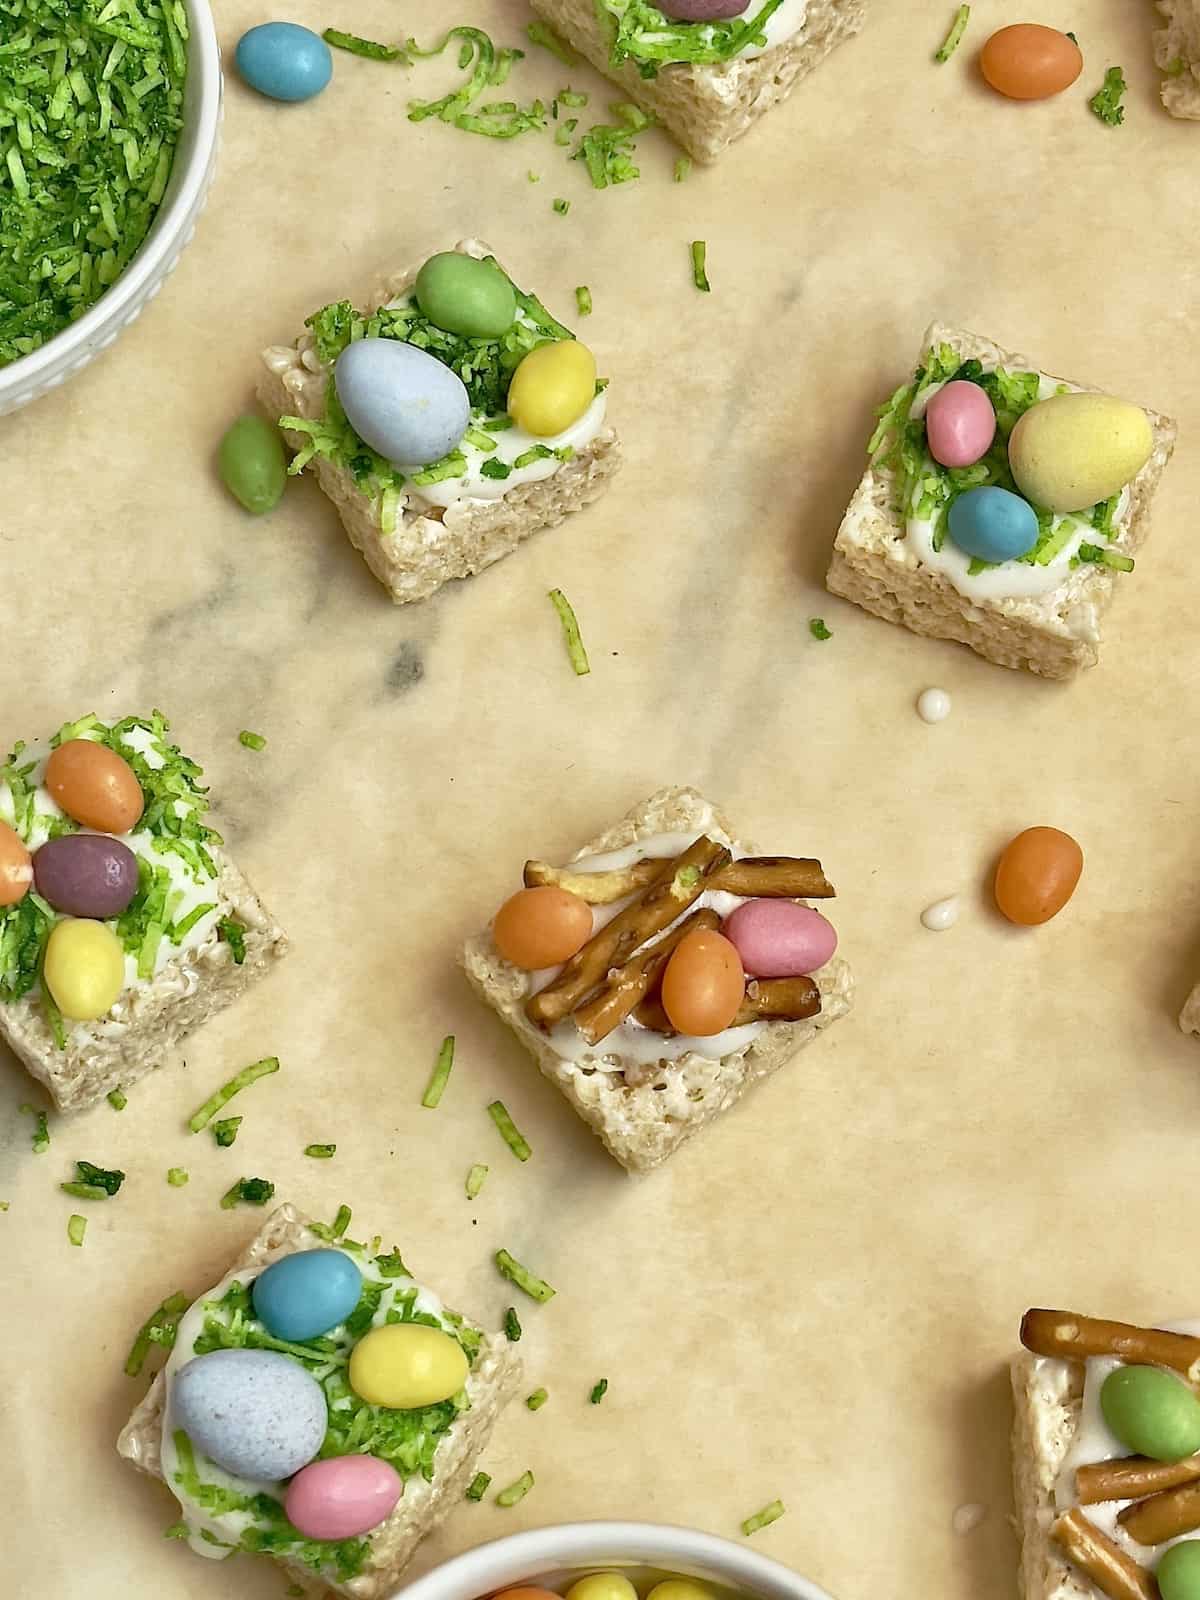
- Dollop about 1 teaspoon of melted marshmallow onto each mini krispie square. Working quickly, sprinkle with coconut grass and/or broken pretzels. Arrange 2-4 mini eggs or jelly beans on top and press them down into the melted marshmallow so they stick.
Recipe FAQs
Mini Egg Rice Krispie Squares are best enjoyed the same day or at least, the next day. So if you plan to make them ahead of Easter, it's best to do it no earlier than the night before.
Keep at room temperature in an airtight container for up to 2 days. Do not freeze or put into the fridge, as the cold temperature will harden the marshmallows and candies.
Recipe
Mini Egg Rice Krispie Squares
Equipment
Ingredients
- 10 Mini Rice Krispie Squares
- ½ cup shredded coconut
- green food coloring
- ½ cup marshmallows
- 10 pretzel sticks
- 30 Cadbury Mini Eggs , or jelly beans
Instructions
- Prepare a work space by arranging the mini Rice Krispie squares on a serving dish or parchment paper. Put marshmallows into a microwave-safe bowl and add 2 teaspoons of water. Put shredded coconut into another mixing bowl and combine with a few drops of green food coloring. Stir well, adding food coloring as needed to reach your desired shade of green. Break pretzel sticks into 2 or 3 pieces and have mini eggs/jelly beans ready to use.
- Heat the bowl of marshmallows in the microwave in 15 second increments until melted. Mix well between increments. Melting takes about 60 seconds total.
- Dollop about 1 teaspoon of melted marshmallow onto each krispie square. Working quickly, sprinkle with coconut grass and/or broken pretzels. Arrange 2-4 mini eggs or jelly beans on top and press them down into the melted marshmallow so they stick.
- Allow marshmallow to harden for a few minutes, then serve.
Notes
Nutrition


Lilly says
These krispie squares are so cute! I love the fake grass made with shredded coconut!
Jeannie says
these are great Easter treats having mini eggs as toppings and I like that it doesn't need baking. Love rice Krispies, they make the perfect snack.
Agnieszka says
Making these for Easter with my kids this year for sure! They look so adorable!
Addie says
These treats are so fun and festive for spring! They are great for both kids and adults. Yum!
Marta says
We made these mini egg rice krispie squares with 6-year-old twins we were babysitting last weekend and each of us enjoyed the project AND the squares. So easy to make and easier to eat!
LaKita says
These little rice krispie treats are so cute and festive. Perfect to make and have the kiddos enjoy topping it themselves.
Jessica says
I love that these are cute but not overdone - and the idea of adding them and your other recipes to a charcuterie board is the best Easter morning surprise I've seen this year! The kids will love it 🙂
Veronika says
These rice krispie squares are going to be such a fun thing to make with the kids over Easter weekend. So cute!
Jacqueline Debono says
Love these rice krispie Easter treats. Such a fun idea and easy to make!
Ann says
These are so cute! I plan on making them for an Easter school and daycare treat! My kids will love these!
Lori | The Kitchen Whisperer says
OMGosh these are so adorable! And so perfect to get the kiddos involved! Definitely adding these to our Easter Desserts table!
Tristin says
My kids had so much fun making these this weekend. It was a great way for them to get creative and they got to enjoy their hard work!
Hayley Dhanecha says
Gosh these krispie squares are so cute, my little niece had so mush fun making these when she visited me over the weekend. Fabulous!!
Krysten says
This is a super cute idea! I want to make this.
Amy Liu Dong says
It is cute and great! The colors are vibrant and the presentation is awesome, its flavor may would not suit others because of the sweet but the overall vibe of this dessert is energetic!
Krysten Wilkes says
My children and I are gonna have to recreate this for Easter! Colorful, fun, and looks so tasty! We can’t wait to give this a try this Sunday. Thanks for this creative idea, my kids are sure to rave about it!